I post recipes here the way that I make them, so of course you should feel free to adapt these to what your family likes! To make this blog user-friendly, I put tags for each major ingredient of each recipe, as well as for type of dish, and ethnicity, so you can go to the list on the side here (scroll down) and search for specific things. If you like a recipe, please comment! If you have a yummy adaptation, please leave that in the comments as well!
I encountered this idea at a local cafe. It's very simple, and really good! They served the rolls plain, or you could get it sliced in half and get it as a sandwich filled with ham, melted cheese, peppers, onions, and other veggies. It's a nice food for taking on picnics and sack lunches, because the whole sandwich is rolled into the bun before it's baked--nothing slides apart en route!
Use your favorite roll recipe (not a sweet roll, just a regular dinner roll)
Roll out the dough as though you were going to make cinnamon rolls, but instead of putting in butter and cinnamon and sugar, put in cheese, sour cream, cream cheese, spinach, bits of ham or bacon, or whatever other savory thing strikes your fancy.
I did ham, spinach, and mozzarella in these ones.
Try turkey with cranberry, beef with swiss, or all kinds of veggie combinations!
This recipe is made with dried fruit filling. I got the original recipe from an old issue of "Taste of Home" and it said to use dried apricots. But I didn't have any apricots, and I did have a bulk-sized bag of cranberries, so I made it with cranberry filling instead. It was amazing! I took it to a church ladies function and got lots of compliments on it.
this was the photo from the magazine
this was mine...not quite a pretty, but still awesome!
Preparation time--the actual work is about 20 minutes, but the rise times will add another hour plus, and the cook time is 20-25 minutes.
Yield: 3 braids
BREAD
1 c water
1/2 c butter
3/4 c sugar
5 1/2 or 6 c flour (I used about 1 1/2 c wheat, and needed the lesser amount of flour)
3 packages dry yeast (1 package = 2 1/4 tsp, so that's 6 3/4 tsp needed)
1 tsp salt
3 eggs, beaten
In a mixing bowl, blend the sugar, yeast, salt, and 3 c flour. Set aside. Put the butter and water in a saucepan and heat just until the butter melts (120-130*). (Be sure it doesn't get too hot or you'll kill the yeast!) Add butter mixture to flour mixture and beat just until moistened. Add eggs, beat until smooth. Stir in enough remaining flour to form a soft dough. Turn onto a floured surface and knead until smooth and elastic, about 6-8 minutes.Place in a greased bowl, turning once to grease the top.Cover and let rise in a warm place until double, about 30-40 min (Mine took much longer than that, partly because I have a cold Alaskan kitchen, and partly because I think I killed part of the yeast by having my water/butter a little too hot.)
While it rises, make the filling.
FILLING
2 1/4 c chopped dried fruit (craisins don’t need to be chopped since they’re already small)
1/2 c water
(for the cranberries I also added about 1/2tsp of almond extract and 1/2tsp of orange extract)
1 1/2 c packed brown sugar
Put the dried fruit and water in a saucepan (and the extracts if you're doing those). Bring to a boil. Reduce heat; cover and simmer until water is absorbed and fruit is tender, about 15-20 minutes. Transfer to a food processor; add brown sugar. Cover and process till smooth. (My food processor is a little one and would't fit everything, so I just put in the fruit, processed that, then dumped it back into the pan and mixed in the sugar with a fork.) Set aside.
When the dough has doubled, punch it down and divide into thirds. On greased baking sheets, roll out each portion into a 12in x 8in rectangle (I rolled a little, but mostly just mooshed it out with my fingers, it was easier because the sides of the pan kept getting in the way of my rolling pin handles!) Spread filling down the center of each rectangle. On each long side, cut 1 inch wide strips about 2 inches into the center. (I actually did the cutting first and put on the filling afterwards, it seemed less messy.) Starting at one end, fold alternating strips at an angle across the filling. Pinch ends to seal. (Rather than pinching the ends, I just folded the two end strips straight up inside the loaves on both ends, and then did the alternating down the sides.) Cover and let rise for 30 min.
Bake at 375* for 20-25minutes or until golden brown. Remove pans to wire racks to cool. Combine glaze ingredients and drizzle over braids.
GLAZE
1 cup confectioners sugar
1-2 Tbs milk
1/2 tsp vanilla (a little orange or almond would be good here too, though I didn't do it)
I think doughnuts are meant to have the hole in the middle--it helps them cook evenly without having a soggy center. However, if you watch them carefully, you can cook holeless doughnuts, and then you can be really fancy and put jelly or pudding in the middle! Jelly-filled doughnuts are a traditional Hanukkah treat. This is certainly not an authentic suvgani'ot recipe, but it's still a jelly-filled doughnut, and they're pretty good. ☺
Make up some spudnuts, but just cut round doughnuts--do not cut out the middles!
If you have an icing bag with a long tip, that would make things simple (just use it to pump jelly or pudding right to the center of the doughnut, with hardly a hole to the outside!)... BUT if you are like most of us and just have standard kitchen equipment, then take a knife and cut a small slit into the side of the doughnut and to the center.
Using an icing bag or ziplock with a small bit of corner cut off, gently put the tip/corner into the hole in the doughnut, and squeeze in about 1 Tbs of jelly or pudding.
The potato in these doughnuts makes them more filling, and adds something to the texture that I can't quite describe, but I love it (something like potato bread...) Plus, when there's potato in your doughnuts, it's a valid excuse to eat one or two more, right?!
they are pretty good just plain, but we usually frost them
Makes about 100 doughnuts (yes, you can easily do a half recipe, but once you get going on the process it's just as easy to make a lot...so plan a party and share!)
1 c warm water
2 Tbs dry yeast
1 c shortening (or butter)
6 eggs, beaten (I actually forgot these once, and they still came out fine)
2 tsp salt
3 c milk
1 c sugar
2 c mashed potatoes
2 tsp lemon juice (optional)
2 tsp grated lemon rind (optional)
1/2 tsp nutmeg (optional)
12-13c flour (I never do any of the optional ingredients)
Dissolve yeast into water, and set aside for a few minutes to proof (get frothy). Combine milk, shortening, salt, sugar, potato and seasonings. Heat to lukewarm. Add beaten eggs and yeast mixture. Add 6 c of flour and beat until well blended. Add remaining flour to make a soft dough (firm enough to roll).
Knead until smooth. Cover and let rise until double.
Punch down, divide in half. Roll 1/2 inch thick (yes, that's pretty thick, don't get them too thin!) and cut out with a biscuit cutter or cookie cutter. (I used a 3" round and then a water bottle lid to cut out the centers, or you can do other shapes as shown.)
if you have nesting cookie cutters in shapes, such as stars or hearts, you can make shaped doughnuts too!
Rise again for 30-40 min.
Deep fry at 375 in an electric fry pan, or on med-high in a heavy pan (cast iron is good) on a stovetop. Turn them overhalfway through cooking, so that they get golden on each side. (Throw in the doughnut holes too, those are one of our favorite parts! The holes cook much faster than the doughnuts though, so I do them in separate batches.)
Set on racks with paper towels underneath the rack to drain (see top photo).
If desired, sprinkle on powdered sugar while they are still hot and wet. Otherwise, allow them to cool a little and then frost.
Latkes are a Hanukkah food (although we make them for most Jewish holidays, simply because I don't know many Jewish recipes). Traditionally they are served with applesauce or sour cream, but my family seems to prefer them with salt, ketchup, or barbecue sauce...oh well, so much for tradition eh?
5 large potatoes (washed and trimmed, but they don't need to be peeled unless you want to)
1 bunch of green onions, chopped (I skip these half the time, just because I forget)
1/4 c flour
3 eggs, beaten
Over the sink, grate the potatoes into a colander. Press out as much of the potato water as possible. Place the grated potatoes in a large bowl and add the remaining ingredients. Stir into a thick 'batter' (it's not really much of a batter, but it will all get sticky and clump together).
Over medium-high heat in a heavy skillet (cast iron is best), heat about 1/4c oil until hot. Drop in scoops of batter and flatten with a pancake flipper. Fry on each side until golden.
Drain latkes on a plate lined with paper towel. Serve warm.
We found this recipe when looking for something scottish to celebrate Saint Andrew's Day. Stovies are a great way to use up some leftover beef and gravy. Of course you can work from scratch also, but I have a feeling this is really meant as a sort of "inspired leftovers" meal. I got this recipe from epicurean, who recommends serving them with oat cakes. I've just copied the recipe from there, and added my own notes. These were a big hit, and will definitely be regularly seen on our menu in the future.
50g (2 oz.) oil, drippings or butter (I used bacon grease)
3 medium onions, roughly chopped
1 kg (2 pounds) floury potatoes, main crop or new
125ml (4 oz.) meat stock or gravy (I used a handful of my beef-stock 'ice' cubes)
125-250g (4-8 ounces) cooked meat (I threw in ground beef because I didn't have leftovers handy. I just browned it, drained it, and set it aside, then added it back in later as per the recipe.)
2 -3 tablespoons finely chopped parsley, chives, or spring onions
Seasoning salt, freshly ground black pepper, allspice, or grated nutmeg
Directions:
You will need a large heavy-base pan with a tight-fitting lid. Heat the fat in it and add the onions. Cook until lightly brown. Peel potatoes if they are "main crop", but leave the skins on new potatoes. Slice about 5mm (1/4-inch) thick. Or slice roughly in different thickness so that the thin go into a mush, while the others stay whole. Add them to the pan with the onions and stir well. coating all sides with the fat.
Put the lid on the pan and leave on a low heat for about 10 minutes, stirring a couple of times. (I used a cast iron pan that didn't have a lid, so I used a piece of foil which worked great. You do need some kind of lid though.)Then add the gravy or water. Cover and cook over a very low heat, stirring once or twice until the potatoes are cooked. Add the meat, mix through, and turn up the heat to brown a little.
Taste for seasoning. Mix in some freshly chopped parsley, chives, or green onion and serve with oatcakes and a glass of milk.
These are somewhere between a biscuit and a cookie...they're a bit sweet, but definitely have a bready aspect to them. I got the recipe from epicurean.com, where they were recommended to serve with Stovies. I've copied the recipe here just as it is on the site, but added some notes of my own.
1 1/4 cups sugar
2 cups rolled oats
2 cups flour
1 teaspoon baking powder
1 teaspoon salt
1 1/4 cups shortening (I use room-temperature butter or lard. If you do use butter it comes out a little salty, so either use unsalted butter or skip the salt!)
1/2 teaspoon baking soda
1/2 cup boiling water
2 cups bran flakes (I didn't have any, so I left them out...I honestly didn't notice them on the recipe until I had already started mixing ingredients... I'm sure you could do some extra oats, but it also worked fine to just skip this ingredient.)
Directions:
Add soda to boiling water and let stand until cool. Mix together flour, baking powder, salt, bran flakes, rolled oats and sugar. Cut in shortening; add water and soda. Roll out thin on a floured board. Bake in hot oven until golden brown. (I just lightly greased a cookie sheet and smooshed the dough around on it until it was pretty thin. It spread a bit as it cooked and ended up filling the pan, but it had not reached all the corners before I put it in. I baked at 400* for about 10ish min...I didn't set a timer, I just left the oven light on and kept an eye on them as I cooked other things...)
I stumbled across a Lebanese cookbook on the "new arrivals" shelf at our library, and as I started flipping through it I realized that all my life I'd been craving Lebanese food, and I'd never even known it! Most of this recipe is just copied straight from that cookbook, however I have added a couple of notes of my own as well. These are a bit labor-intensive, but they are fun, and they are yummy. If you're not into spinach, try stuffing them with cheese, sausage or other spiced meat, or a combination.
Preparation time: Dough--5 min, plus 1 hr 15 min rising Filling--10 min (do it while the dough is rising) Putting it together--an hour Bake time--18-20 min They are time and labor-intensive, however they keep well in the fridge or freezer, are good cool or cold, and reheat well too.
BASIC DOUGH
1 cup + 1 Tbs lukewarm water
1 1/2 tsp yeast
1/4 tsp sugar
3 cups flour
3/4 tsp salt
3 Tbs olive oil
In a small bowl, dissolve the yeast and sugar in the water. Mix well. Set aside for several minutes, allowing the yeast to proof (foam). Combine the flour and salt in a separate bowl.
Make a well in the center of the flour mixture. Pour the yeast mixture into the well, followed by the olive oil. Using one hand, quickly mix and knead the ingredients to form the dough. (If the dough seems sticky, which it probably will, sprinkle in a little more flour.)
Use both hands to lift the dough out of the bowl and tuck and shape it into a ball. Sprinkle flour around the sides and bottom of the bowl, then set the ball back in. Sprinkle the top of the dough with some more flour. Cover the bowl with a dish and set it aside in a warm place to rise for 1 hour 15 min.
FILLING
2 lbs frozen chopped spinach (thawed, drained, and squeezed dry) (I use 3 10oz boxes, but you can also fill it out with some shredded zucchini or other mild vegetable)
1-1 1/2 cups chopped onion (chopped little)
1 Tbs salt (yes that's a tablespoon)
1/4 tsp ground black pepper
1/3-1/2 c olive oil
1/3-3/4 c lemon juice
1 Tbs lemon zest if available
Squeeze the thawed spinach over a colander with small perforations. It is very important to make sure that all the moisture has been hand-squeezed out of the spinach, otherwise the filling will be wet and the pastries may open while baking.
In a bowl, combine the spinach and onion. Just before you are ready to fill the pastries, add the salt, pepper, olive oil, lemon juice and lemon zest, and mix well. (Mixing the salt with the onions at the last minute prevents the onions from producing additional moisture in the filling.) [The original recipe calls for 1/3 c olive oil and 3/4 c lemon juice, however I find that is a little tangier than I like. So I prefer to make it closer to 1/2c of each. It's still tangy.]
Once the dough has risen, roll out half the dough on a lightly floured surface to a 1/8" thickness. [It will be around 16" across. If you make it thinner/bigger, it still works, however you will end up with more dough than filling...when that happens to me I grab a little cheese or whatever to fill up the leftovers. Also, use as little flour as you can to do the job. If you get too much flour, the dough will not stick closed very well.] Gently hold the rolled-out dough by the edges and lift it about 2 inches off the counter (this will allow any contraction in the dough to occur before cutting). Cut the dough into 3 inch rounds with a cookie cutter; make one cut directly next to another to maximize the number of rounds.
Preheat the oven to 450*F. Foil-line a baking sheet, lightly brush it with olive oil, set it within reach.
Pick up one dough circle at a time and hold it stickier-side up in your hand. Put about 2 Tbs of filling into the middle of the round (this will probably seem like too much filling, but you want it stuffed so they will be plump once they are baked). Use a fork [or one of your fingers] to push the filling inside as you close up the dough. Be sure to keep all the edges free of filling, or they will not stick together. Form a triangle by raising three sides of the dough up and over the filling until they meet in the center. Press them closed.
[this video is made by the guy who wrote the cookbook, showing how he stuffs and closes the puffs]
Pinch each seam closed, securing the filling inside the triangle. Remember to keep the seams free of filling. Repinch the seams so that the pastry will not open while baking. Reshape the pastry into a triangle as needed, and place it on the greased foil-lined baking sheet. Fill and close the remaining dough rounds in the same manner, and place them on the baking sheet about 1/4 inch apart. Repeat with the second half of the dough.
Dip a pastry brush in a few tablespoons of olive oil and generously dab the tops and sides of each triangle puff. Place the tray in the middle rack of the oven and bake for 18-20 minutes.
Traditionally, spinach puffs are served at room temperature. Our family likes them a little warmer than that, but as I said before, they are also pretty good straight from the fridge.
* To prepare ahead, you can keep them in the fridge for a few days, or in the freezer for a few weeks. Freeze uncovered on a baking sheet, then transfer to an air-tight bag or container. Reheat thawed puffs at 350* for 5-7 minutes.
You've asked for slowcooker recipes... ☺ My husband actually does most of the crockpot cooking around here. He does this one with a homemade barbecue sauce. Sorry, I can't give you the recipe for that, because he can't give me the recipe for that, because he just dumps stuff in and does it by smell every time. Purchased barbecue sauce usually has lots of additives, but if you learn to make your own it can be free of gluten and other allergens... ours usually has tomato paste, tomato sauce or ketchup, brown sugar and/or honey, vinegar, chili powder, garlic powder, liquid smoke, salt, etc...(Obviously to be GF you'd then have to eat the meat with a fork, rather than on a bun...but we tend to do that sometimes anyway!) You can also do this with beef brisket.
1 pork shoulder of several pounds (other pieces may work also, but you want one that will shred apart, so not chops or loin) With or without bone is fine.
Barbecue sauce
(that's it!)
Put the (thawed) meat in the crockpot, cover it with barbecue sauce (as in, put sauce all over it, not bury it under a lake of sauce!). Cook on high for a few hours. I always like to check in on it about halfway through the day, and if it's cooking fast then switch it to low...but it can go on high for a good 6-8 hours (or on low for 10-12 I would guess).When it is done, get a fork or knife or tongs and pull the meat all apart. Stir it around, add a little more sauce if you like, and let it cook a few more minutes.
Serve on rolls (I used these ones) with mayo and/or barbecue sauce.
I got this recipe from my aunt. Of course it can be adapted (some of our adaptations are mentioned at the bottom). I like it chunky and fresh, (and I can it that way--just put it raw in the jar) but it doesn't develop a thick sauce that way. If you like a thick sauce, you'll need to simmer it on the stove a while. I can't give you any specific directions for that though, because, as I said, I don't do it. ☺
makes about 3-4 cups of salsa (I usually 6x it or more for canning)
3 med/large tomatoes
1 onion
2 cloves garlic
1 sweet pepper (bell, any color)
1 hot pepper (I use jalapenos, but if you like it hot use something hotter or use more of them)
1 tsp salt
1 tsp sugar
2 Tbs something acidic (apple cider vinegar or lime juice is what we usually use, but lemon juice or other vinegar would work also)
cilantro, if desired
Chop it all up--I like my tomato, onion, and bell pepper chunks bigger and my garlic and hot pepper minced into oblivion...do what you like.
Toss all the veggies into a big bowl, and then sprinkle the spices and vinegar/juice over the top. Mix mix mix! Yum yum yum!
If you're canning it, put it straight into the jars, and process following the directions for tomatoes (it is acidic enough to process in a waterbath or steam canner, you don't need a pressure cooker).
Some of our favorite variations Lime/garlic/cilantro ~ Use lime juice instead of vinegar, double the garlic, put in a bunch of cilantro. Spicy ~ Use a habanaro pepper instead of jalapeno, or use 2-3 jalapenos instead of just one. Cilantro will add kick as well if you like that flavor. Southwest ~ add a (drained) can of corn and a (drained) can of black beans to the recipe above.
I took the simple GF cookies and tweaked them... I wanted to try using honey instead of sugar, but then they were too runny. So I swapped out the egg for baking powder, but it was still too runny...so I added cocoa. (This was not my first attempt at using honey in this recipe, it was just the first attempt that actually turned out as anything other than a pile of goo!) I decided to name them stardrops because the dark cookie with the glittery sugar reminds me of the nighttime sky. They're really pretty.
Makes about 3 dozen
1 cup peanut butter 3/4 cup honey 1 tsp baking powder 1/4 cup cocoa
Blend together, then put in the fridge for about an hour to chill. It is very soft and sticky, so it needs to chill or you'll never be able to roll it into balls. Honestly, I betcha you could put in 1/3-1/2 cup shredded zucchini. If you're into that. It would help them be not quite so sticky. ☺ I haven't tried it though. After it chills, roll it into little balls (work fast, because as it warms it will soften and increase in stickiness again!), then roll each ball in a bowl with sugar, and place it on a greased cookie sheet. (I tried doing some without the sugar, and they stuck really badly, so while you can do it that way, I don't recommend it.) Bake at 375 for 8-10 minutes. They will be extremely soft when they first come out, just let them sit a couple of minutes and then you'll be able to get them off the pan. ☺
My friend gave me this recipe--I think she invented it but I'm not certain. In any case, as she pointed out, it's just intended to be a simple cookie recipe, but it also happens to be gluten-free. And dairy free.Cool! 1 cup peanut butter 1 cup sugar 1 egg
Mix together. Roll into balls and put on a greased cookie sheet. Dip the bottom of a cup in sugar and then press down on the top of each ball to flatten it a bit (I use a tupperware cup, thus the double circle in each cookie ☺) Bake at 350 for about 10 minutes.
You can also add in all sorts of other things, nuts, chocolate chips, oatmeal...whatever you like. You may need to bake them as bar cookies or change the cook time if you do those things.
Here is one rendition I've done: Egg, peanut butter, sugar 1/2 cup rolled oats (which i ground in the food processor so it was more like flour than oatmeal) 1/2 cup applesauce about 1/3-1/2 c chocolate chips. I put it in a 9x9 pan and baked it at 350 for 25min. It could have gone a little longer probably--it was really mushy when it was hot (I ate it out of a bowl rather than as a bar)
This isn't a true Indian recipe in that I didn't get it from a cookbook or anything, but it's a combination of traditional Indian spices, even if not traditional cooking methods, so I surmise that it's 'authentic' in that it's the sort of thing an Indian housewife might throw together... The flour in the coating is merely to spread the spices around evenly. I used rice flour and it was gluten free. ☺
1/4 c butter Cut up butter into a 9x13inch pan and put it in the oven to melt as the oven preheats to 350* (don't forget to get it out as soon as it's melted!) Set aside.
COATING (mix in a shallow dish or pie tin) (all amounts are approximate, I just dump stuff in) 1/2 c flour (or rice flour ☺) 1 Tbs salt 1 tsp pepper 1 Tbs onion powder 1 Tbs garlic powder 1 Tbs turmeric 1 Tbs cumin 1-2 tsp cardamom 1/2 tsp cloves (1 Tbs cinnamon would also be authentic, but I forgot it, so either way...)
8 chicken pieces (I used thighs because they were on sale, but any pieces would work) I skinned them but left the bones in. Press each chicken piece into the coating and get it fully covered on both sides. Then lay the pieces in the melted butter in the pan. Bake for about 20 min, then turn each piece over and bake for another 20 min. (Meanwhile cook the rice and veggies)
RICE 1 chopped onion 3-4 cloves chopped garlic 1 tsp salt *2 cups white rice 4 cups broth and/or water and/or coconut milk (I used about 2 cups homemade broth then the rest water) Put a little oil in a pan and saute the rice, onion, salt, and garlic until the onion and rice get glassy. Then add the liquid and let it simmer (without stirring) until all the liquid is absorbed (about 15min for white rice)
*adjust the amount of rice accordingly if you use brown or a white/brown mix
VEGGIES I just used some frozen peas/carrots/green beans and steamed them, which is very not authentic. If you want something more authentic, try peas, carrots, potatoes, or tomatoes. You can steam them or saute them in a little oil or cook them in with the rice.
Serve everything together in a heap. Or not. However you like it. ☺
I invented these as a good snack for my son to take to school. He loves muffins, but isn't so much into veggies...so I decided to put his veggies into muffins so that he would have something healthy and conveniently portable (and yummy!) all in one. I usually make them as mini-muffins, and a batch rarely lasts 24 hours. He has taken them as a class snack as well and said that everybody liked them. There are two ways to make these muffins--one is with grated veggies (carrots or zucchini), and the other is with pureed veggies, such as squash or even baby food. There are a couple of other changes to make up for the textural differences between those two options, so read the recipe carefully! (Using the pureed veggies makes it an egg-free recipe.) The veggie taste is masked by the stronger gingerbread flavor, so you can use pretty much whatever veggies you want. I have done it with carrots, mixed veggies, and squash, but I'd love to hear about your experiences with other veggies! As a note--this is a pretty potent gingerbread. We like it that way. However if you like a milder flavor, just use half the amount of cinnamon, ginger, and cloves.
mix 1 1/2-2 c grated carrots or other veggie 2 eggs OR 7-8oz pureed veggies (carrots, pumpkin, squash, etc) 2 tsp vinegar
add 1/2 c oil 1/3 c molasses 2/3 c white sugar 1 tsp vanilla
mix well add 2 c flour (I use whole wheat, as you can't tell in the gingerbread flavor) 1 tsp baking powder 2 tsp baking soda 2 tsp cinnamon 2 tsp ginger 1/2 tsp cloves 1/2 tsp salt (optional)
Bake at 350 for about 20-25 min for regular size muffins (10 min for mini-muffins)
I realized recently that one of my favorite things at a Mexican restaurant is the rice and beans that they serve on the side--especially when they have melted cheese and that little bit of lettuce and tomato and sour cream. So I played around a bit and came up with this. I like the contrast of hot and cold, as well as different textures. Rice + beans makes a complete protein so it is filling as well as delicious. Think of it as being like a taco salad...only without the taco bowl! We have been on an extra-tight budget since being laid off, so one thing I have done is figured out ways to use my WIC vouchers more effectively, to make entire meals rather than just compliment them. This salad is one of those meals. (I know there is some variance between states, but ingredients marked with * can be purchased with WIC vouchers in Alaska.)
serves 2
*2-3 cups cooked white and/or brown rice (1ish cups dry) *1 can beans (I like black beans) (alternately use about 1 1/2-2 cups cooked beans which is about 3/4c dry) *1 can diced tomatoes OR 1 largeish fresh tomato *2/3 cup grated cheese *1- 1 1/2 cups chopped lettuce Sour cream, ranch, or other creamy dressing
a note on lettuce--I like the crunch and texture of iceburg lettuce, but you could use a leaf lettuce as well, or some other kind of greens if you prefer.
This can be prepared two different ways--one is to prepare all the parts and then let people put them together at the table. The other is to put the plates together as you prepare them. For a la carte serving: Cook rice. Heat beans, then drain. Chop up tomato, or drain/rinse canned diced tomato (if using canned, heat tomatoes, if using fresh, keep them cold). Grate cheese and chop lettuce. Serve everything in little bowls. For prepared plates: Cook rice then divide and portion onto plates or wide bowls. Drain and rinse beans, then layer over rice. Sprinkle on grated cheese. If using canned tomatoes, drain and rinse, then layer over rice/beans/cheese, then put the whole thing in the oven or microwave until heated through. If using fresh tomato, then heat plates before adding tomato. Then top warm mixture with cold lettuce (fresh tomato if applicable), and dressing.
If you want to use this as a packed lunch, it does reheat really well. Just use two containers--one for the hot parts and one for the cold parts. Heat the hot parts, then add on the cold parts...voila, easy meal on the go!
I looked up several recipes and then sortof adapted this based on what I had on hand. I've never been fond of quiche, or of salmon either for that matter, but this was pretty good! The kids liked it, and my husband had two portions and then ate the leftovers for a bedtime snack. Anything that is worthy to be a bedtime snack is probably pretty good. ☺ I confess I've become a fish snob since living in Alaska, so I wouldn't dream of feeding canned salmon to people (we give it to our dog)...but if it's all you have it will work. I actually used leftover from the patties I'd made earlier in the week.
makes 2 8" quiches, or probably 1 deep dish 9" (I prefer to do two smaller ones so they cook through more easily)
2 pie crusts
6 eggs 1 1/2 c milk 1 1/2-2 c grated cheese (I did half mozzarella and half monterey jack, but swiss would also be good) 1 1/2 c shredded salmon (or about 1 can). You can also use leftover baked/grilled salmon if it's not heavily seasoned, but make sure it's thoroughly de-boned! 2-3 Tbs dill salt & pepper
Preheat oven to 375. Bake (empty) pie crusts for 5 minutes. Beat eggs, then add milk, cheese, salmon, and spices and mix well. Pour into slightly cooked crusts, then bake for 45 more minutes (it may need a little longer--test by inserting a knife in the middle of the quiche, when it comes out clean the quiche is done)
We have started catching out own salmon this year, but we're still getting the hang of filletting them, so there ends up being lots of little pieces of meat that we trim off the bones after the fillet is off. We didn't want to waste the meat, but at first I wasn't sure what to do with so many tiny pieces (it was from 16 fish so there was a lot!). Finally I hit upon the idea of using it like ground beef--mashing it up, shaping it into patties, and serving it as burgers. They were awesome! The texture was perfect, but we couldn't really taste the dill I'd seasoned it with, so next time I'll use something a bit stronger. 2 cups salmon bits (fresh & raw is best, leftover would also work I think, or canned...) 1/4-1/3 c bread crumbs or rolled oat or leftover cooked rice 1 egg seasonings (salt, pepper, garlic or garlic powder, dill, tarragon, etc)
Whir the salmon around in a food processor for a minute, or chop it/flake it into small pieces. Add remaining ingredients and mix well. If it's too sticky, add more bread crumbs, if it's too dry, add another egg or a little milk. It should hold together well--like ground beef does when making regular hamburgers! Heat a little oil in a pan on medium heat. Pack the salmon mixture into tight balls (I used a scooper like I do with the black bean and rice patties) and then flatten them into a frying pan. Cook for a couple of minutes on each side. Salmon cooks quickly, and changes to a much lighter color when it is done. The outside of each patty will be a little browned and crisp (and hold it together), but the middles will still be soft. Can be eaten on buns with mayonnaise, lettuce, tomato, pickles and onion...or eat them plain, perhaps with some sour cream, sundried tomatoes, etc...
"reese-grit" Rice cereal, a recipe my husband brought home from Norway. I admit I wasn't thinking it sounded very appetizing, but it's really quite good. It's traditionally served with butter and cardamom, but cinnamon or cinnamon-sugar is good too and may be a more familiar taste for some.
1 cup short grain rice (other white rice will do, but short grain is best) 1 1/2-2 cups water 1 cup milk butter cardamom, cinnamon, or cinnamon-sugar
Put water and rice in a saucepan and simmer until water is dissolved (or nearly so). Add milk and keep simmering until all is soft and liquid is gone. Keep a good eye on it so that it doesn't boil over or burn to the bottom of the pan! Serve hot with butter and cardamom or cinnamon.
This is the only way I've ever really liked rhubarb. I have a tendency to eat it for breakfast, but it's also good a la mode. The original recipe is made with just rhubarb, but I've found that substituting in as much as half strawberries (and cutting the sugar down by 1/3c per cup of strawberries) is also really yummy. Makes 9x13 pan
1/3 cups brown sugar 1 cup flour 1 cup softened or melted butter 3 cups rolled oats Mix together. Press half of the mixture into a 9x13 pan, reserve the other half for the top. (I often do closer to 2/3 in the bottom of the pan, as the under layer gets the juices soaked in and is better than the top in my opinion.)
6 cups finely chopped rhubarb 3 Tbs flour 1 cup white sugar Mix flour and sugar together. Coat rhubarb by shaking them all together in a covered bowl (or just dump them all into a really big bowl and stir a lot). Put filling in pan on top of under-crust. Cover with remaining crust mixture. Bake 1 hour at 350.
This could work with any white fish--halibut is my favorite and is plentiful here, but I know it's very expensive in other places! Try this with dill instead of tarragon for a different twist. I served it with couscous & veggies on the side (and kinda mixed them together as I ate). It would also work well with pasta, potatoes, or rice (with veggies). My kids gobbled this up--and we parents really enjoyed it too. Serves 4
1 lb halibut, deboned and cut into smallish chunks (bite size more or less) 3 Tbs butter 3 Tbs flour or cornstarch 1-1 1/2 c milk 1/4 c parmesan cheese (this could be omitted, or another cheese could be substituted--I admit I used the cheap powdered type) 1 tsp salt 1/2 tsp pepper 2ish Tbs tarragon
Cut fish and set aside in a 9x9 baking dish. In a saucepan over medium heat, melt butter and mix well with flour until it becomes smooth and thickens. Slowly add milk, about 1/4c at a time, and mix thoroughly after each addition. Add seasonings. Add cheese if desired. Stir continuously or at least very frequently so that it does not burn. Sauce will thicken as it cooks, so each time it starts to thicken you can add a little milk again until it reaches a nice thick cream sauce (it should be like gravy). Pour sauce over fish, stir to coat each piece of fish, then bake at 350 for about 10-15 minutes (stir once in the middle to make sure that all pieces of fish are cooking evenly).
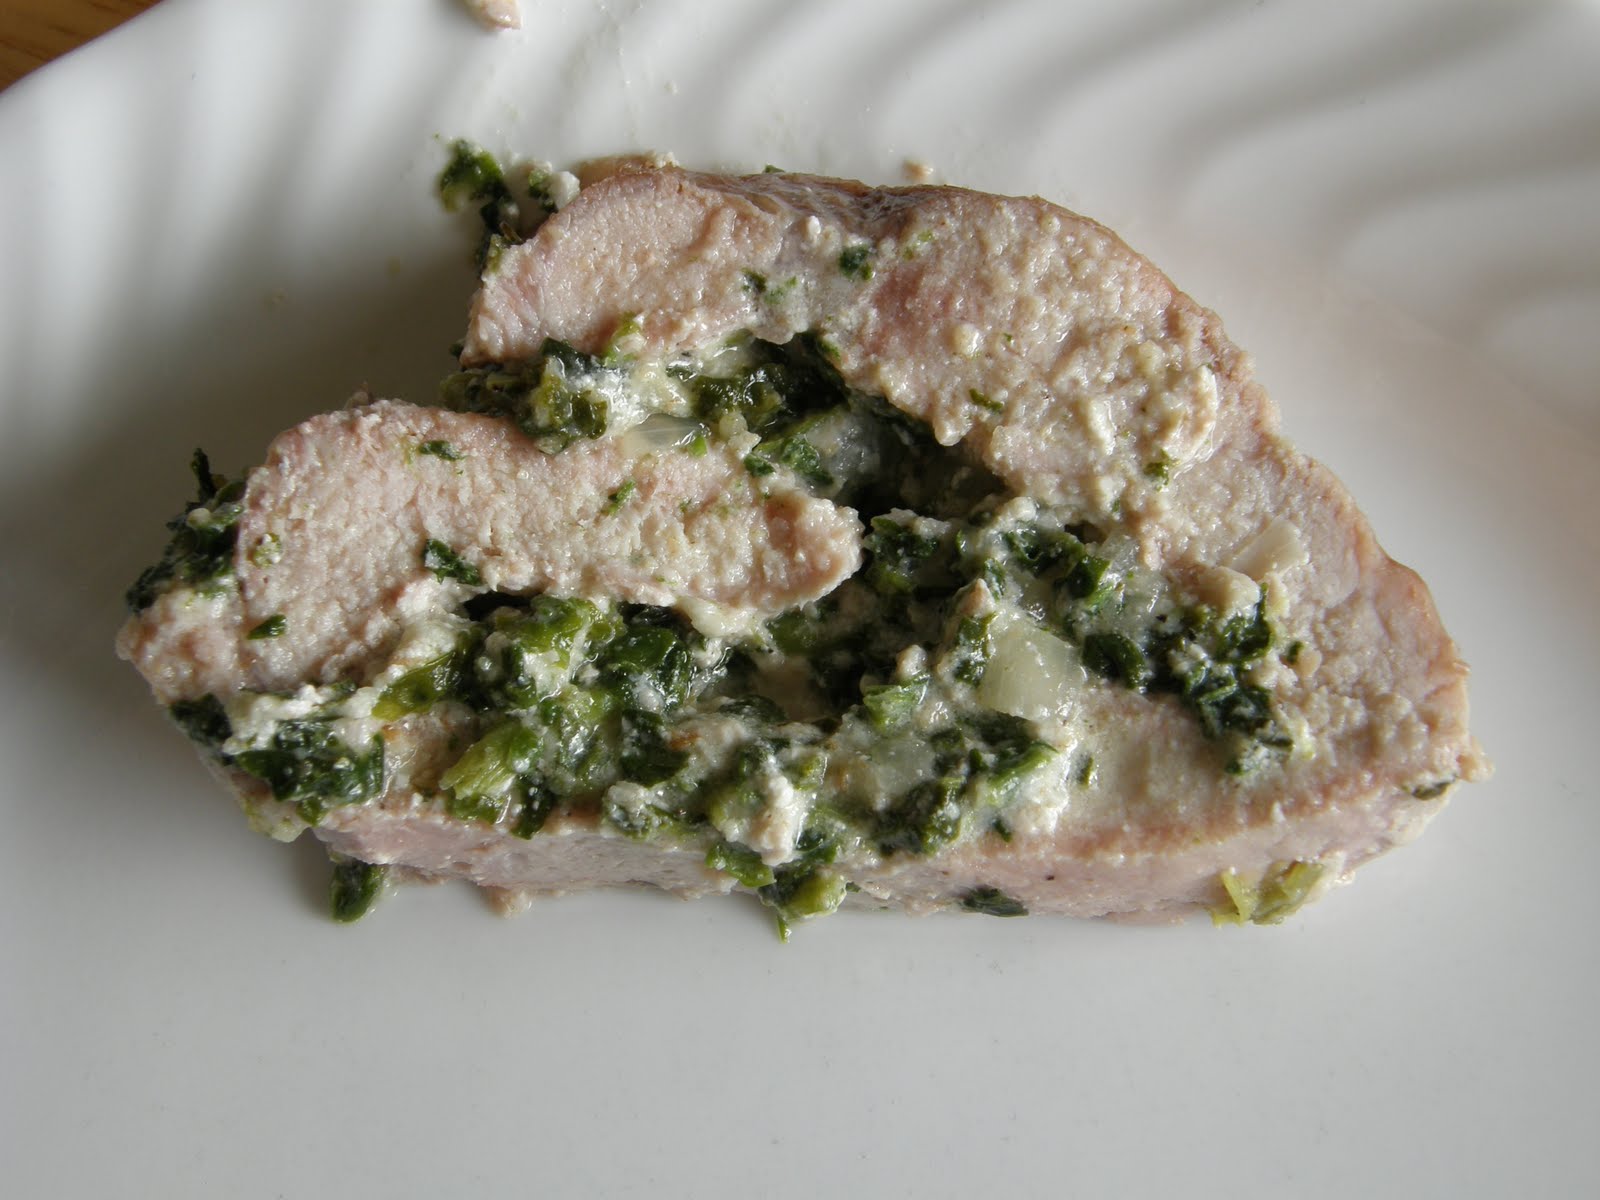
If you have never made stuffed meat before, I heartily recommend watching this youtube tutorial for how to slice open the meat. It was very helpful for me. I started with this recipe as a basis, but altered it a lot. I think this same filling combination would be awesome in a turkey breast, although you'll have to do your own research on how to slice the sucker. ☺
1 pork loin (I don't know how many pounds, but mine was about 12inches long..3ish pounds maybe?) 1 c sour cream 1/2-3/4 c shredded mozzarella cheese 1/2-3/4 (10 oz) package of frozen spinach, thawed (about 1 1/2 c cooked and chopped), and well drained 1/2 c diced onion 2-3 cloves minced garlic (I did 5...) 1/3 c dry bread crumbs a few Tbs olive oil 1 tsp salt 1 tsp pepper string (I made due with thread, but that tends to cut into the meat, so string is much better)
Cut open roast according to directions in tutorial, so that is lays flat. Spread sour cream evenly over meat. Sprinkle mozzarella evenly over sour cream. Saute onions in a little olive oil until they get soft and glassy--but not browned (optional), then mix spinach, garlic, onion, bread crumbs, salt, and pepper together in a bowl. Put in the olive oil from the onions, plus a little extra as needed to make the mixture stick together (it should not be crumbly nor slimy, but just kinda gooshy...) Sprinkled spinach mixture evenly over the mozzarella on the meat.
Roll up the meat log, and tie closed to secure it. Then carefully transfer it to a pan.
Bake, uncovered, at 325 for about 1 to 1 1/2 hours. It is done when the internal temperature reaches 160* (use a food thermometer, if you overcook it it will be very dry, but if you undercook it it won't be safe). I hear that you can cook it to about 135 or 140, then take it out and 'tent it' (cover it with foil while still in the hot pan) and let it sit for about 15 minutes, then it will finish cooking in its tent. I have not done this personally, so I don't know. ☺
Most folks in the world call these coffee cakes, but in a coffee-free household, I grew up calling it breakfast cake, because that was when we usually ate it. ☺ This cake--especially the sugar topping/filling part--is moister than most other coffee cakes I've had. I like it that way, but if you like the really dry/crumbly ones then this probably isn't the recipe for you. If you melt the butter in the topping, it will be moist but also sink to the middle or bottom of the cake. If you use just softened butter it will be a dryer topping and will stay on top better. One of our favorite things to do is layer sliced peaches in the bottom of the pan before pouring in the batter (if you use canned, which I usually do, be sure to drain them first!)
[sorry I don't have a photo here, this was posted spur-of-the-moment specially for SamauriMom who needed a coffee cake recipe!]
Makes 1 8x8 pan (double recipe for a 9x13 pan) (I admit I usually do 2x the cake and 3x the topping in a 9x13...)
Cake 1 egg 1/2 c sugar 1/2 c milk 2 Tbs melted butter (the original recipe says shortening, but eww!) 1 c flour 2 tsp baking powder Cream egg, sugar, milk, and butter. Add flour and baking powder. Mix well and pour into greased pan (over peaches or other soft fruit if desired).
Topping 1/4 c brown sugar 1 tsp cinnamon 1 Tbs flour 1 Tbs softened or melted butter Mix together with a fork, and sprinkle over top of cake batter (or drop in more-or-less-even little blobs all over).
I usually make this half wheat/half white, because I've had troubles with it being too heavy when I did 100% wheat. However, I've recently begun using white wheat from the LDS church cannery and I am able to do 100% with that. The more whole wheat you use, the longer rising time it will need compared to if you do white. This is my basic bread recipe, and the one I use to experiment with alternative flours, such as oat flour. Whenever exchanging in a new flour remember that not all flours have the same gluten content, so not all of them will rise very well. Oat flour for example won't hardly rise at all, and needs to be mixed with at least an equal amount of wheat flour or else have gluten added separately. These photos happen to be of a rare white batch. 2 Tbs yeast 1 cup warm water 3 Tbs sugar (the original recipe called for more but I cut it back. I've tried leaving it out and it really seems to feed the yeast and help the whole thing rise--without the sugar I had flat bread--so I have settled on using this amount) 3 cups warm water or milk 4 Tbs oil or melted butter 1 Tbs salt 12 cups flour (white, wheat, or other)
Soften yeast in 1 c water with a little of the sugar. Set aside until it gets frothy (about 5 minutes). Put remaining water/milk, oil, salt, remaining sugar, and 2-3cups of flour in a very large bowl and mix well. Add frothy yeast and mix. Put in remaining flour and mix. Knead until smooth--about 10 minutes (don't short yourself here, a good knead makes a huge difference in the texture of your final outcome!). Grease or lightly flour the bowl, return dough to bowl and cover with a clean towel, and set somewhere warm to rise until double. Punch down the dough, then re-cover and let rise until double again. Divide into 4 parts, shape each into a loaf and place in pans. Cover with a towel and let rise again. (As a tip, whatever height the bread is at when you put it in the oven is roughly what it will be when it comes out of the oven...) Bake at 400* for 25-30 minutes
See the light fluffy texture? (yes it gets that whether it's white or wheat, it's all about thorough kneading and having enough rise time!)
I am often an "eyeball measurer" meaning that I just dump a bit in and guess, rather than actually measuring. However sad experience has shown me that this recipe is one where it is worth measuring everything!! 1/2 lb ground pork (I recommend unseasoned, as maple or italian seasoning would be a bit weird for this!) 1/4 c chopped scallions (or onion, or green onion) 2 Tbs chopped red pepper 1 egg 2 tsp ketchup 1 tsp mustard 2 tsp worchestershire sauce 1 tsp brown sugar 1 tsp salt 1/2 tsp pepper 1/2 tsp cayenne (optional)
1 package potsticker or wonton wrappers (you can also use eggroll wrappers cut in quarters if you can't find the small ones)
Brown pork and remove to a paper towel to drain off grease (you can save the grease for frying the potstickers, or just drain it and fry with something else). Mix pork with all other ingredients in a bowl (except the wrappers of course).
Put about 1 tsp of filling in each wrapper and close the edges (the packages usually have directions, otherwise see below). Fry in a little oil/grease for a couple of minutes--until browned on 2-3 sides. If desired, add 1/2-1 c water and put on a lid to steam them through, (some recipes say to boil them but I think they get waterlogged)
**To seal potstickers:
Put filling in the center of the wrapper
Moisten your finger in a bowl of water, then run it along the edges of the wrapper to make them sticky
Fold the wrapper in half (with the filling in the middle) and stick the edges together. If you're feeling daring, try one of the fancier ideas below
Squeeze out any excess filling juice as you seal it.
Envelope fold: bring one corner across the middle, then the opposite corner across the first. Finish by bringing the other pair over one at a time. This makes a flat little "package" that looks like an envelope. Square Purse or Pyramid (shown above): pull all four corners together at the tips, then seal down each straight side (so it makes a little pyramid with the filling in the base). Round Purse or Pyramid: find three roughly equally-spaced points around the edge, and bring them up to the center, sealing the edges between them. (I will try to remember to take pictures next time!)
I adapted this recipe from the ones I found at allrecipes and recipezaar. It has a lot of ingredients, and no, you shouldn't leave anything out. There's a delicate balance at work here, and everything plays a part. The sauce is very sweet, and it needs the salty chicken to balance it; if you use the sauce alone you'll need to add some salt. I like steaming some broccoli, onions, and carrots and serving them with the rice/sauce as well. Alternately, make just the sauce, and use it as a stir fry sauce (rather than making the fried chicken part). Cornstarch can usually be replaced by using double the amount of flour...I don't recommend that for this recipe though because the thickening properties of the cornstarch are really important to the texture, and flour really doesn't do it as well. To make this dish gluten-free, replace the flour with half the amount of cornstarch OR (better) with rice flour or a GF flour blend. Chicken Marinade mix in a medium sized bowl 2 Tbs soy sauce 3 drops *toasted sesame oil 2 Tbs flour 2 Tbs cornstarch 2 Tbs water 1/4 tsp baking powder 1/4 tsp baking soda 1 tsp vegetable oil *the "toasted" part is important, it means the seeds were toasted before the oil was expressed, and it has a much stronger flavor. It's available in the asian section of the grocery store
Use fresh or thawed chicken--about 3 breasts or 4-5 thighs. Cut it into 1 inch chunks and then put into the marinade to sit for about 20 minutes (the marinade is thick so the chicken is not so much 'soaking' as it is 'coated' with the marinade).
Meanwhile get some rice going. ☺
Sesame Sauce mix in a medium sized saucepan 1 1/2 c chicken broth 6 Tbs cornstarch dissolved into 3/4 c cold water 1/2 c sugar (this could probably be reduced, but I haven't played with that yet) 3 Tbs soy 2 Tbs rice wine vinegar (or white vinegar) 3 Tbs toasted sesame oil 1 1/2 tsp chili paste (or same amount of chili oil, or you could probably use red pepper flakes) 2-3 cloves chopped garlic 2 Tbs sesame seeds (you can sprinkle them on top at the end, but I find it easier to just mix them right into the sauce) Mix over high heat, stirring continuously, until it comes to a boil. Reduce heat to low so that the sauce stays warm and thickens while you fry the chicken.
To Deep-Fry the chicken, I recommend using a wok if you can, because of its shape you'll be able to use less oil. To be really authentic, use peanut oil. Vegetable oil also works fine. (Light olive oil might be ok, but don't use EVOO--extra virgin--as it has a stronger flavor that just won't work for this.) Put enough oil in your pan to be about 1 1/2 or 2 inches deep, and heat it until very hot. Carefully add the chicken pieces a few at a time--they will want to stick together if you add them at once, so add them individually. Cook for 3-5 minutes (I always cut open the largest chunk from my first batch or two to check for doneness). Remove chicken from oil and set on paper towels to drain. You can set the cooked portions in the oven on low to keep warm while you cook the remaining chicken.
Place chicken on a large platter and pour sauce over it, then serve over rice. Or, if you're like me, just serve everything in it's own dish and let people choose their own ratios. ☺
This is light and yummy, but really fills you up. As photographed here, I baked it in one big loaf in a deep cast iron pan. It came out really well that way. If not using stone or cast iron, then make sure to make two loaves rather than one, otherwise it will be too big to get cooked through evenly. 1/2 cup warm water 4 t yeast Put together then set aside
1 1/4 cup water or milk 3 Tbs oil 6 Tbs honey 2 cups dry rolled oats Mix liquids in a large bowl, then add oatmeal, and allow to soak for a few minutes before adding additional ingredients.
4-5+ cups flour 1/2 tsp salt (if desired) enough powdered milk to make the water be 'milk' instead Add some flour, then the yeast mixture, then the rest of the flour etc. Stir until well mixed. It is a somewhat sticky dough, but add flour until you are able to knead it. Set in the bowl in a warm place with a towel over the top and let rise until double. Punch down, divide if necessary, and put into well-greased pan(s). Cover with towel and let rise a second time until double. Bake at 375 for about 30-40 minutes.
Traditionally this deep-fried battered fish would be served with 'chips' (fat french fries), but I actually prefer to do onion rings, because I use the same batter for both fish and rings.
Cut white fish into fillets and make sure there are no bones. (If you buy it it should already be this way, but if you caught your own then obviously you'll have to do it yourself!) I like to make them on the smaller side--I slice thick fillets in half depth-wise (so I have two thin fillets), and I cut them down to about 4x4inch pieces. I like a high batter-to-fish ratio. ☺
Batter: In a wide and/or shallow bowl, put 1 cup self-rising flour (or 1 cup white flour, 1 tsp baking powder, 1/2 tsp salt). Slowly add water until it is about the consistency of pancake batter...maybe 2/3 or 3/4 cup of water usually. If it is too thin it will all drip off the fish (or onions)!
Heat oil in a wok, saucepan, or deep frying pan (I like using a lid to avoid oil splatters, but an oil screen works too). You can deep fry the fish, but I find that using a high-sided frying pan I can 'deep fry' them in only about an inch of oil, I just have to turn the fish over halfway through the cooking. It uses less oil, and seems to get less oil into the fish as well.
Put battered fish pieces into oil and fry until golden and cooked through--about 3-5 minutes per side, depending on the size of the pieces and whether the fish was frozen or thawed. Use tongs or a slotted spoon to remove fish and set on a paper towel to drain. Serve hot!
*This does NOT reheat very well (it's ok in the oven but terrible in the microwave), so if you have leftovers I recommend eating them cold.
Recently I had some leftover pizza sauce and toppings from family pizza night. I wanted to use them up, but didn't feel like going to the full effort of making pizza, so I did this instead. (Conveniently I had a leftover loaf of french bread as well!) serves about 4
1 loaf leftover french bread, cut into slices pizza sauce (tomato sauce with garlic powder, basil and oregano) shredded mozzarella cheese pizza toppings--cut into little pieces
Spread the slices of french bread on a cookie sheet. Put a generous amount of sauce on each (the bread slices are thicker than a typical pizza crust, so you'll want the extra moisture). Then put a generous amount of cheese and whatever toppings you like best. Bake at 400 for about 8-10 minutes, or until cheese is melted.
This is a pasta dish inspired by pizza...it's just much faster to make!
Serves about 4
4 c cooked pasta (about 3c dry), I recommend penne or macaroni or some other firm/small piece pasta, not spaghetti or linguini.
Favorite pizza toppings, such as pepperoni, sausage chunks, olives, peppers, onions, etc Pre-cook anything that is raw.
1 can stewed or diced tomatoesand/or 1 small can tomato sauce
about 1 c shredded mozzarella cheese
(optional) basil, oregano, garlic powder
Cook the noodles and drain off excess water. Return noodles to a wide saucepan (or a high-sided fry pan). Add tomatoes/sauce and stir a bit until the juices release into the pasta. (If the stewed tomatoes are in large chunks, chop them up before adding.) Add spices and all other pizza toppings, and sprinkle in cheese. It should be a little cheesy but not stuck together in one big gob. Serve immediately.
I just want to take a moment to point out some new sections on the "cookbook tabs" section in the sidebar. I already had categories for food types, meal types, allergen-free/friendly recipes, kid-friendly recipes (stuff my kids love anyway!), quick & easy recipes, things that reheat well, and International flavors. I have now added a section for "Food Storage Foods" which is recipes made almost exclusively from items that would (should!) typically be found in food storage. They use canned, frozen, or dry goods rather than fresh (or canned/dry/frozen could easily be substituted). I certainly believe that fresh is the ideal from a nutritional standpoint, but we all know that unless you live in a temperate climate you can't get fresh year-round. Having a food storage, whether it's 3 months worth or a full years worth, is a good idea. A lot of people get some wheat and beans but then have no idea what to do with it all...hopefully some of these recipes will be helpful. I also added a section for budget-friendly foods. Finally, I've added a tag called "pack-it" which is foods that are good for packing, whether it's for picnics, vacations, school lunches, or eating at work. Most of the 'reheats well' recipes are already great to take along to work or school if you have access to a microwave or oven, but the 'pack-it' foods are things that do not need to be reheated, and for the most part are packed with nutrients for kids like mine who rush through lunch so they can get out to the playground. ☺ (You know you're doing something right when your 9 year old son comes home from school one day and says "I don't like hot lunch anymore, I'd rather take leftovers.")
I may give up ground beef now. If you leave off the cheese these are easily vegan as well. If you just stack the patty with the veggies and no bun, then it's gluten-free. ☺ Rice + beans = a complete protein, and we find these just as filling as meat burgers. For variations, add barbecue sauce to the mixture, top the burgers with salsa, sour cream, and guacamole instead of traditional burger toppings.
1 can black beans rinsed and well drained or about 1/2 cup dry, cooked until soft (alternately, use refried black beans)
1 cup cooked brown rice, (1/2 cup dry) cooked until soft (drain any excess liquid)
Cheddar Cheese (we like grating about 1/2 cup of cheese and mixing it right in with the beans and rice, it helps everything stick together...alternately place a slice of cheese on top of the burger while it's cooking on the second side)
Mash up beans with a fork. Add rice (and cheese if desired) and blend well. Pack into tight balls--I use a round scoop like this ---> and then smoosh them out a bit in the pan, but the scooper compacts them nicely. Fry in a little oil (a cast iron skillet works wonderfully). Cook 4-5 minutes per side, or until the surface of the patty gets a bit browned and crunchy. Don't try to do it faster--they will fall apart!! I put a lid on the pan to melt the cheese. Put on a bun and accessorize as desired. ☺
This makes about 2 1/2 cups of mixture, and the original recipe said that made 4 patties, but we don't make them quite that big or that thick or something, because I was able to get 5 or 6 patties (4-5" across) from a batch. We normally make slightly smaller burgers so I could get 6+ of those.
Leftover bean/rice mix is great rolled up in a tortilla with some sour cream and guacamole by the way. ☺
from Best of Country Breads cookbook--many thanks to Maria for giving me this recipe, we use it constantly! I love how fast they are to make--they really are just 40 minutes. My husband says he thinks he likes it better than my grandma's rolls (which might be blasphemy). These buns are nice and hearty, so I do a wheat/white blend for plain eating, but most (or all) white when we use them for burgers. I don't think I'll ever want to eat a purchased burger bun again though. I am going to start experimenting with making these oblong for hot dogs and hoagies. Makes 10-12 buns (the recipe says it makes 12, but I usually do 10, and they are still on the smaller side (I like smaller burgers so that works fine). If you want big 'quarter pounder' size buns, expect this recipe to make 8-9 buns.
2 Tbs active dry yeast 1 cup + 2Tbs warm water (that's 1 1/8 cups) 1/3 c oil (vegetable or olive) 1/4 c sugar 1 egg 1 tsp salt 3-4 cups flour (can be done whole wheat, although tastes best at about 50/50 white/wheat. You will need more flour for higher white content, less for higher wheat content)
In a mixing bowl, dissolve yeast in warm water. Add oil and sugar, let stand for 5 minutes. Add the eggs, salt, and enough flour to form a soft dough. Turn onto a floured surface and knead until smooth and elastic, about 3-5 minutes. Do not let rise! Divide into 12 (or fewer) pieces; shape each into a ball. Place 2-3" apart on a greased baking sheet and flatten slightly. Cover and let rest for 10 minutes (they will rise). Bake at 425* for 8-12 minutes or until golden brown. Remove to wire racks to cool.
A couple of weeks ago I was asked to bring a dessert for our local cub scouts' annual Blue & Gold Banquet. I decided I was going to do something blue and gold...
I started with the recipe for my great-grandma's sugar cookies. Once mixed, I divided the dough into even portions in two bowls, put blue food color in one half, and yellow in the other.
With the first color of dough I used two same-shaped cookie cutters in different sizes, and cut out large stars with small stars cut out of their centers. Then I did it with the other color of dough.Then I swapped the centers and sprinkled each with a little sugar (I also put food color in my sugar, and put it in an emptied spice jar, so it's easy to sprinkle on... I like this better than frosting sugar cookies because it's faster, easier, and not quite so over-the-top sweet, and these cookies are pretty rich already!) This worked very well with my recipe because the cookies spread a little, so the two colors expanded into each other a bit and stuck together. If your dough does not spread while cooking, this won't work.
Try hearts, circles, or another simple shape where you have cookie cutters of different sizes in the same shape!